Archive | August, 2010

Guilt.

29 Aug

It is a funny thing….guilt.  I was supposed to run 14 miles this morning for my marathon training and I just couldn’t get out of bed. I was having a great dream—  an interior designer was walking through my house giving me decorating tips–I thought I should stay in that dream to get as many ideas as I could.

My husband gently tried to wake me up at 7 am and I shoe-ed him away. (I seriously threw a shoe at him to make him leave.)

Now, that I am up and have had a couple of cups of coffee, I have guilt.

I should have gone running.  ” Instead of complaining about it, why don’t you go now?,” you might ask.

The heat in Florida is unbearable after 9:00 am and I would melt out there.  I’m a wimp like that.  If I don’t start running by 6 am, I can’t get a long run in.   And, my friend that I run long with has a hurt foot— without her to inspire me, it is hard to keep going.

This morning I plan to redirect my guilt—-and make monkey bread for my monkeys!  Instead of feeling guilty over not running, I will bake and blog.  I will work on my class for next week and I will start getting my garden ready.

Guilt redirected–and monkey bread on the way.  Stay tuned for the details!

Soft Pretzels

28 Aug

I don’t know if you remember, but I started this blog to teach myself how to cook.  Along the way, I have discovered that I can cook and bake….I have learned all kinds of little skills and found out where to go for information when I need it. I have been very proud of some of my cooking achievements and kind of bummed with the outcome of others.  But, these pretzels completely wowed me!

There are a few things I normally put into the category of “things I cannot make at home”——-things like: bagels, croissants, cinnamon rolls, danishes, doughnuts,–and soft pretzels easily fit into that category.  It is not that I don’t believe that it can be done–I just have been of the mindset that they would never taste as good as the bakery bought variety.  I was proven wrong with the cinnamon rolls I made a few months ago.  And, I was proven wrong with the soft pretzels I made a few nights ago.

This has inspired me to come up with a list of “things to attempt” and a “list of things to perfect”.  I should be posting that up on the little website soon but it is sure to include danishes and doughnuts, pasta and gyoza.  It’ll be my to-do list and will help keep me on track.

Anyway,  back to the homemade soft pretzels……..

There are five ingredients.  Flour, yeast, salt, honey and water.  So, these are vegan pretzels too (depending on how you think about honey, and for that matter, yeast).

It does require some rising time and some boiling (or is it blanching?)—but all in all, they are very simple to make and pretty quick.

Wanna try it?  I promise if you do, you will add these to your own ” I can’t believe I did this!” list.

Homemade Soft Pretzels

Recipe from Baker’s Illustrated

Prep Time: 10 min

Inactive Time:  2 hours

Active time: 15 min

Baking Time: 12 min

1) In your stand mixer bowl, add the following ingredients:

3 cups of flour (they suggest bread flour but I used all-purpose and still loved them)

1 tsp yeast

1/4 cup of honey

1 tsp salt

1 cup of warm water (about 110 degrees)

2) Using the dough hook attachment, mix it together on low speed for 5-7 minutes.

3)  Let them rise!  Put the dough ball into a lightly oiled bowl and let sit covered for about two hours.

For some reason, my little one decided to take a nap at 6:00 PM on this particular day and I was able to make pretzels, read an entire book on the biodiversity of life (OK, I skimmed it), finish up a blog post, make dinner and play with the dogs.  Gotta love that in-active cooking time!

4) After about two hours, punch down the dough and let it rise for about 45 more minutes.

5) During the second rise, get out your biggest pan –I used my mega-huge cast iron pan which is very wide and big and shallow.   Add 3 T of baking soda and 6 cups of water.  Bring to a boil.

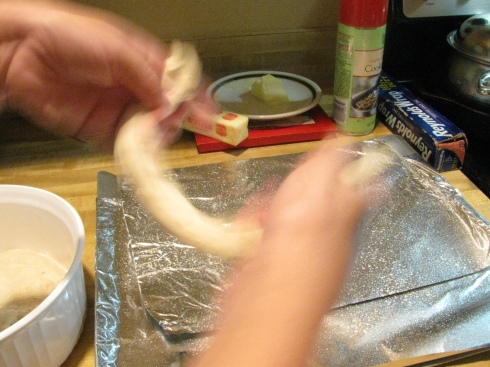
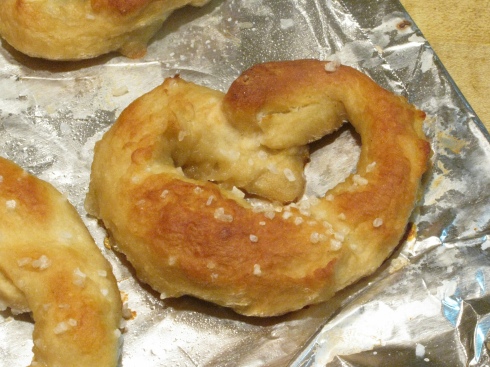
6) While you are waiting, assemble your pretzels.  Divide the dough into 12 equal portions and roll into a 12 inch long snake.  Take your snake and make it into a long U shape.  Grab one end and fold it into the center of the U.  Take the other end and bring it to meet the first central piece.  Does this make sense to anyone but me?  Your pretzels should kind of look like this:

(I took this picture to show off my few perfect pretzels—believe me, there are some really bad looking ones on this tray.  Practice makes perfect!)

7) Once you have your pretzels assembled, they will need a hot bath.  Using a slotted spoon, drop them into the boiling water and let sit for 30 seconds on each side.  Remove from the bath with you slotted spoon or tongs and place on a baking sheet. 

8) Sprinkle with coarse salt or poppy seeds.

9)  Bake for 12-16 minutes or until well browned.  Remove from the baking sheet and allow to cool.

10) Admire your creation….You really are an amazing cook!  And then serve them up with a side of mustard.  We enjoyed them slightly warm.

Salty Chocolate Shortbread Cookies

17 Aug

The kids start school soon…..exactly one week and my little baby will be off to Kindergarten. I’m kind of excited.

I’m sad that the summer adventures will soon be over but am excited about Fall and Winter–Halloween and Christmas.

Does anyone else start to feel this way in the middle of August?

Maybe it is the oppressive heat that we are facing.  Maybe it is the pull of cookie baking season.

In anticipation of fall,which in Florida really just amounts to finally turning off the air conditioner and letting some fresh air in,  I made Salty Chocolate Shortbread Cookies and plan to make them again and again.

A couple of notes though:   iIf  like me, you are expecting to whip up a cookie and eat some about 30 minutes later–these are not the cookies to make.  I didn’t read the recipe before I began and didn’t realize that they would need to sit in a fridge for a few hours.  For a cookie that can be whipped up really quick, try these — and are great with some ice cream sandwiched between.

Make a double batch.  I was unaware of how quickly these cookies would be snatched up in my house.  They went FAST.

Salty Chocolate Shortbread Cookies

Recipe from Browneyedbaker.com which was  adapted from Baking: From My Home to Yours by Dorie Greenspan (the book I bought myself for my birthday).

You will need:

1¼ cups all-purpose flour
1/3 cup unsweetened cocoa powder
½ teaspoon baking soda
1 stick plus 3 tablespoons (11 tablespoons) unsalted butter, at room temperature
2/3 cup light brown sugar
¼ granulated sugar
½ teaspoon kosher salt, plus extra for sprinkling
1 teaspoon vanilla extract

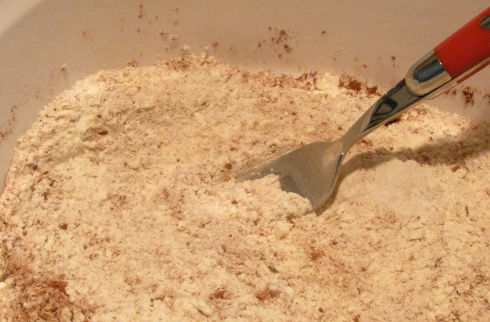
1) Mix flour, cocoa, and baking soda together in a bowl.  I tossed mine together with a fork since I don’t have one of them tools they use for sifting.  One of these days I’ll have to experiment with one and see if they are really necessary.

2) Beat together the sugars, butter and vanilla.

3) Turn off the mixer and add the flour/cocoa combination.  Mix until the flour is combined.  Continue mixing for 30 seconds to 1 minutes.  The dough will be crumbly and weird looking.  At this point, you may be asking yourself, “Did I forget to put something in?”, “Are there supposed to be eggs in this recipe?”

I am here to tell you now—Don’t worry.  It will work out.

4) Lay down a couple of sheets of plastic wrap and take half of the mixture out and roll it into a log.  I am not quite sure how to make a nice uniform log so that I end up with nice uniform cookies.  This is something that I need to work on…..But even though my log was kind of lumpy and mis-shaped, it was OK. My cookies didn’t turn out as pretty as they could have but they still tasted great.

5) Put your logs in the fridge for a few hours—I had to wait overnight and it worked out fine.

6) When you are ready to bake, heat your oven to 325 degrees and line a cookie sheet with parchment paper.

7) Slice the logs of dough into 1/2 inch slices and sprinkle very lightly with the kosher salt.

8) Bake for 12 minutes.  You may question if they are truly done as they will look puffy and soft–but that is OK.

9) Let the cookies cool on a baking rack.  We thought they were best when they were completly cooled—but you can eat them when they are just warm as well.

Happy Almost Back-to School!

Nature Coast, Florida

14 Aug

This past weekend, we took a long overdue weekend trip away from our house.  I have a problem with travel—I can never have enough of it.  I need it.  I crave it….I don’t know what I would do without it.  With two kids, two dogs, work and school schedules-not to mention, finances, I have to count our weekend getaways as travel.   And a weekend getaway accomplishes exactly what I need from travel—quality time with my family, new and interesting experiences, and a separation from our daily distractions.

Aaron’s parents were in town from Vermont and we decided to take them up the Florida Nature Coast–a place none of us had ever been.  We knew we wanted to see manatees, mermaids, and spend some time in freshwater and figured that would be the best place to do so.

We started by driving up US 19 to the little town of Weeki Wachee, for our first stop at the beautiful Weeki Wachee springs….probably the only place on Earth that exists to honor the mermaid.  Founded in 1946, Weeki Wachee Springs was a tourist destination for the movie stars is kind of like going back in time.  Though modernized with its small spring fed waterpark, most of the park has a retro feel to it.

Everywhere you look, there were mermaid statues and sculptures.  The main attraction though is the live mermaid show, where mermaids perform for an audience in a sunken theater in the spring.  The spring itself is supposed to be the deepest in the country (world?) and releases over 100 million gallons of water per day from the underground aquifer.  The water was crystal clear and so beautiful.  The mermaids, as you may have guessed are not real mermaids at all—but rather, young women in tails, who have learned to breath through these hoses as they dance and sing–UNDERWATER!  It was really quite odd to see them, underwater—singing, eating, drinking–all while holding their breath.  They would perform little song and dance numbers and then disappear behind a curtain of bubbles.  It may sound kind of cheesy–and it is–but it is also kind of cool and very unique.  If you are in Florida, I highly recommend it.
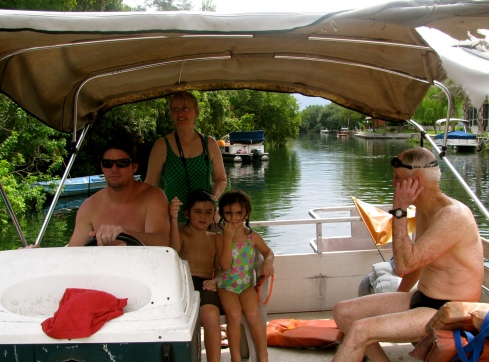
After Weeki Wachee, we continued up HWY 19 to the town of Crystal River and checked into a Best Western located on Kings’s Bay.  This is where I got a little bit confused.  You see, the plan was to rent our boat the next morning and take it up the Crystal River to look for manatees and crystal clear water.  I had been told that manatees congregate in the crystal clear waters of the spring fed Crystal River.  Everyone I talked to said, “There is no Crystal River, you gotta go out into the bay.”

“The Bay??”  I would ask, seriously confused.   “I thought that the manatees were going to be in freshwater–not salt water.”

“The bay is freshwater”, they would reply, “Have fun and make sure to get under the bridge before the tide comes in.”

Okaaaay.  Whatever.  Maybe in Northwestern Florida they have different terminology.
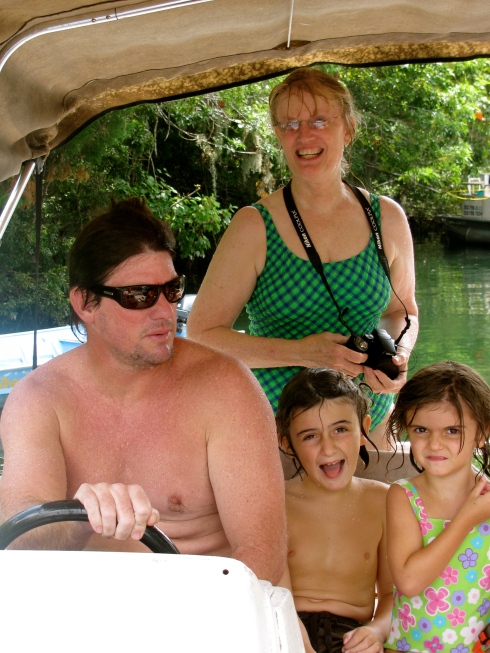
We rented our boat and we went out into the “bay” and up a little canal, which was lined with fancy houses.  I had thought we would be in a rural area but was totally wrong.  We got to the entrance to the 3 sisters springs and there were tons of other boaters, kayaks, swimmers in the water.  After some gentle coaxing and then some passionate coaxing to get the kids in the water—we started our 100 yard swim to the 3 sisters springs.

In the picture below, you can catch a glimpse of the springs……although you are NOT allowed to go across this grassy field—you must swim around.

Let me  tell you a little bit more about this.  We had to jump off the boat and into the canal that was lined with other motorboats and lots of people.  The water did not look inviting at all.  It was deep and dark.  It smelled of gasoline from the boats motoring by and it was cold.  72 degrees year-round.  Needless to say, it was a little bit difficult to get the kids off the boat.

Actually, it was very difficult to get S off the boat—N was the first one in.  That girl has no fear.  S took about ten minutes with his toes dangling from the ladder-until I got frustrated and pulled him in.  The screaming and yelling that ensued after that was horrifying.  It was not one of my finer parenting moments.  And, if you dear reader, happened to be out there that day–I am sorry that you had to witness that.  You may be glad to know that he perked up very soon after that–as soon as we entered the springs.

And how could you not, the springs were so beautiful.  Crystal clear water.  Perfect.  Deep, cool, tree-lined.  I was a little hesitant as we had to swim through this small canal maybe 2 feet across and I kept thinking of things like crayfish, leeches and snakes.  You know, creepy freshwater things.

But after about ten feet through the tiny canal, it just opened up into a huge blue pool.  At one point, the water must have been close to 40 feet deep and the visibility was so good that you could see all the way to the bottom. Trees had fallen into the water and they made such pretty underwater sculptures.  It was really something to see.  Aaron saw some fish and some crabs and other than that we didn’t see anymore wildlife.  There were about four other springs that we had planned to explore but the sky was beginning to darken and we thought it was better that we head back to port.  Good thing too…..as soon as we got back, a huge thunderstorm erupted.   Perfect time for lunch!

The Crystal River area is not known for their excellent cuisine and although we didn’t have super high expectations we did want to have some good fish.  We tried.  The first night we drove 9.5 miles down this beautiful road, into the middle of nowhere.  As we turned a corner, there was a completely filled parking lot.  A good sign, right?

We had arrived at “Peck’s Old Port House” for a dinner of fresh crabs (they farm them there) and other seafood.  I don’t want to spend much time reviewing the place but I should say, that Jennie (my mother-in-law) went for their fresh soft shell crab and was not disappointed.  The rest of us were.  My grouper was fine—just completely uninspired.  And, the french fries were cold and awful.  Aaron and I tried the clam chowder and it was excellent.  Thick and chunky–just how we like it.  We all liked the hushpuppies.  For dessert, we had to try their Key Lime Pie —and would never recommend it.  It tasted like Cool-Whip mixed with a bit of lime flavoring.  Ugh.  In summary, the drive to Peck’s is nice and if you go and just get the clam chowder you will be happy.

Oyster’s was our lunch destination after our boat trip.  We were happy and hungry when we pulled into their parking lot.  The place seems kind of dive-y……  It is right on the main highway, and was a big room filled with mis-matched tables and chairs.  I thought it looked full of potential.  And, all of the various awards on the walls made me feel like we had made a good choice.

Our server was very nice and she brought lots of stuff out to distract the kids.  The meals, were once again, nothing special.   My in-laws really liked their gumbo but my clam chowder was runny and thin.  We ordered a side of hushpuppies so that I could do a comparison between the hushpuppies at Peck’s—but they never came.  The kids did have great french fries with their meal.  And, to top it off, we shared a slice of Key Lime Pie—-and it was good.  100 times better than the Key Lime Pie of the previous evening……..but still not the best ever.  I did love that Oyster’s was owned by a local family and there were pictures of the chef’s kids all over the walls…..very cozy and homey.

After lunch, we had some time and decided to check out Homossassa Springs State Wildlife Preserve.  It was right up the road and since I love state parks, I wanted to check it out.  This park is more like a zoo…for injured and rehabilitated Florida animals.  The weather was very stormy that day and the radar showed more and more storms popping up—at the entrance, they told us that some of the animals wouldn’t be coming out and that the boat ride had been canceled because of lightning.  We decided to go anyway–cause we are ADVENTUROUS like that.

The place is set up kind of Disney-like.  The visitor’s center is right off the main highway–but once you get in, they take you via boat or tram to the actual park.  The boat ride would have been neat—but the tram ride was nice too.  We went down a little road with beautiful foliage.  Once in the park, we headed straight to the manatee and floating underwater viewing platform.  This platform was built over another natural spring (Homossassa Springs) and was another crystal clear pool….I wanted to jump in so badly.  The pool was filled with fish—mullet, sheepshead, snook.  But, the stars of the show were the manatees.  They would swim by, so close, spinning and spinning……slowly eating, just begging us to jump in and play with them…(don’t worry,  I know that they are a protected marine mammal and touching, harassing, playing with them is illegal.)  The manatees there had been struck by boats or had flippers wrapped in trash and were held in captivity because of their injuries.

The weather seemed to be on our side.  And luckily, it kept the crowds down.  There was no one there—-and it seemed like the kind of place that was used to some serious crowds.  We got to see a famous Hippo, who used to be in the movies.  He almost pooped on me as I was taking this picture:
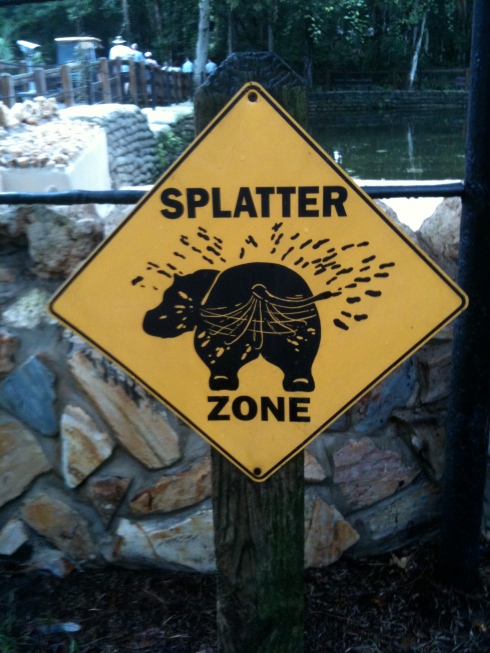
The park ranger came running up, yelling, “Move back!  Get out of the way!  You’ll be sorry!”  I thought he had to be talking to someone else….I would never be so stupid to stand next to a pooping hippo.

Um. Yeah.

There were foxes, hungry wolves, amazing birds, a Florida bobcat, the requisite alligators, and even a bear–but I was focused on the manatees.  (The Florida panther and the bear were in hiding….)  There was a nice boardwalk that we walked around to see all of the animals and the weather was cooperating.  The clouds kept it cool but it wasn’t raining and the rumbling thunder we kept hearing seemed far enough away. And like I mentioned, there was no one there.  (The gift shops were immense—and you can tell that it gets crazy there.)

I recommend the place if 1) you like animals, 2) you have kids and 3) especially, if it is a stormy day and you know no one would be there.  I think that if it had been crowded, we would have hated it.
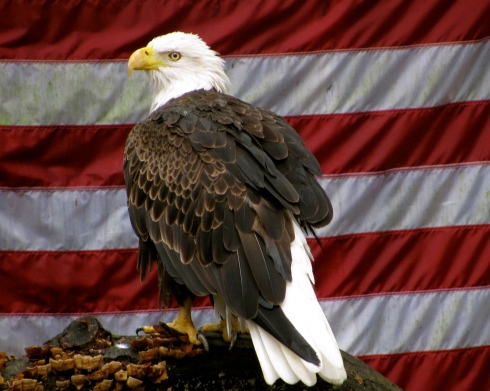
We ended our weekend get-away with burgers from Five Guys.  The in-laws had never heard of the place—(What do they eat in Vermont?) and we had promised to take them there.  They were impressed with the french fries for sure……

Black-eyed Peas+Sweet Potato+ Quinoa=YUMMY!

13 Aug

I thought my Aaron was busy in the kitchen making himeslf and the kids a couple of steaks.  Little did I know, that he had researched and planned to make this dish especailly for me!  And it was good…..actually very good–and a complete meal all by itself.   Or you could serve it up with some veggie meatballs, like I did.  (I have been trying this new brand, Gardein or Gardein of Life.)
And to counteract the healthy dinner that he made, I made chocolate shortbread cookies that I will share with you all later.

Here is the super quick recipe that he used….and I’m sorry to whoever invented this recipe as he can’t seem to find the original website that he grabbed it from.

You will need:

1/2 c. quinoa

1 T olive oil

1 sweet pototo peeled and cubed

onion

1/4 tsp chile flake

1/2 tsp salt

3/4 beans (black eyed peas!)

Lime juice

2 T cilantro (although you could use ALOT more)

Here is what you do:

1) Grab a saucepan and heat up olive oil and saute the onion, potato and red pepper flakes.  About two minutes.

2) Throw in the quinoa and let it toast for about two mintutes more.

3) Add the water and cover it up.  Let cook at a medium low temp for 10-12 minutes or until things are soft.  If there is any water leftover, uncover and set on high temperature and let the water steam away.

4) Remove it from the heat and add the salt, lime juice and beans.  Toss

5) Serve with plenty of fresh cilantro!

Hearty, wholsome, easy and tasty!  Make it for someone special tonight…….

Rainbow Cake, First Try

6 Aug

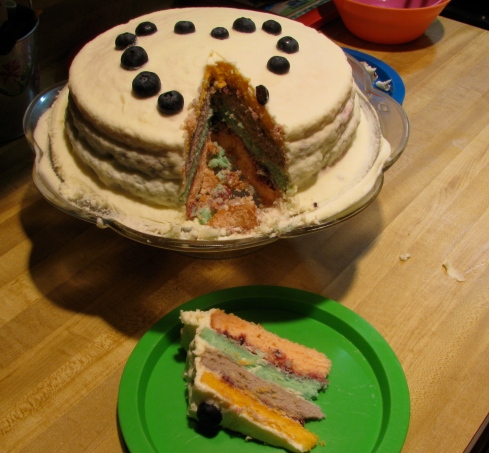
(Apologies for the not so beautiful picture.  I guarantee you though—-the next attempt will be better.)

Aaron’s parents were coming to visit and I thought it would be the perfect time to try the Rainbow Cake.  Remember the Rainbow Cake?

They are from Hawaii (but live in Vermont) and love rainbows.  They have even named their “Hale Anuenue” , which means house of rainbows in Hawaiian.

Making this cake required getting new cake pans (Yay!), lots of time in the kitchen figuring out what to do with the frosting.   Buttercream? Swiss Buttercream? Cream cheese?  I just couldn’t make up my mind.

Instead of thinking about it for a couple of more months, I decided to just go for it.

And, I want you, dear loyal readers, to know that this is a cake in progress.  I intend to make a lot more rainbow cakes until I get it perfect and I thought I would take you along for the journey.

Wanna know what I did?  Here are the steps:

1) I started with the basic vanilla cake recipe that I used for my best ever vanilla cupcakes.  These are great cupcakes and I thought it would make a good base for the rainbow cake.  I doubled the recipe so that I would have enough to make four thin 9 inch layers.  If you haven’t made these cupcakes, you really should–they are a bit dense but very moist with a great vanilla flavor.

The recipe is here.

Once I had the batter mixed up, I split it into four bowls.  One for each color.  My kitchen was a mess at this point —with every counter top covered with batter, flour and food coloring.  I used the Wilton concentrated food gels to add the color to each portion of batter.  When you use this, you only want to use a very small dab of color at a time.  Problems:  I couldn’t get the colors as bright as I wanted to.  The red came out pink-ish and the purple was a lavender.  My cake looks very little like the picture.  Next time will be better……

It is hard to tell but the layers on the right are pink and orange.  I ruined the green layer as it was coming out of the pan……

Lay the baked layers on parchment or a cooling rack (another kitchen essential I don’t have) and let cool completely.

Frosting:

So, this is where I had the most dilemmas.  I knew that I wanted a white frosting but I didn’t really want the traditional buttercream frosting.  I looked around and decided to go with a mixed version—smitten kitchen’s Swiss Buttercream and Dorie Greenspan’s Buttercream (used in Baking to frost a party cake).

Just as Deb from Smitten Kitchen relates, this frosting is kind of  fickle….. Supposedly after intense mixing, the frosting will just magically come together.  I think I got impatient before that magic moment.  I’ll have to try it again.  I will say though, even though it was a bit runny when I frosted the cake, it looks so pretty after cooling and then thawing.  It kind of sparkles.  Very pretty.  And it tastes great.

Here is what I did:

1) Add 4 egg whites and 1 cup of sugar to a large bowl, placed above a pot of simmering water.  I used the bowl on my Kitchen Aid so I wouldn’t have to transfer bowls.  Using a whisk or a hand mixer, whisk together constantly until the mixture is warm.  (It seems as if this is making marshmallow creme…..and I wonder, maybe I could just use marshmallow creme instead of this step.  Has anyone ever tried it?)

2) Put your bowl on your stand mixer and mix with the paddle attachment for a bit ( 5 minutes or so) to let it cool.  Add one stick of butter at a time and whip it good! (Speaking of “Whip It”, my mom just went to a Devo concert…..Isn’t that weird?)

3) According to Dorie, you should whip this for about ten minutes.  After ten minutes, my frosting didn’t seem very frosting-like.  It was a bit curdle-ly and runny.  But, I am not patient and I needed to get the cake frosted. Later, I realized that smitten kitchen had taken about 20 minutes before it was at the desired consistency.  So, I need to try it again.

Putting the cake together:

1) I wanted to alternate the colors but since the green was destroyed in the process, I knew it needed to go in the middle.  So, we sandwiched the green between the purple and pink.

2) I also used a fancy jar of blackberry preserves (from Denmark!) and stirred them with a spoon until they were easy to work with.

3) The layers went like this: Cake, Blackberry Preserves, Frosting, Cake Blackberry Preserves, Frosting, and so on.  You get the picture.

And because I am a dork, I decided to throw some blueberries on top…and in case you are wondering, they are supposed to be in the shape of a heart.

What was the verdict?

Well, you can’t go wrong with the vanilla cupcake recipe….it works just as well for thin layers as it does for cupcakes.  Next time, the colors will be brighter……The swiss buttercream was good too—and so pretty.  Next time, I am going to try to mix it up for a bit longer (unless my mixer konks out) and see if the magic happens.  Even if it doesn’t —it will still be good.  And finally, I may try raspberry preserves or just more of the blackberry.  That was my daughter’s favorite part and it added a nice contrast between the buttery frosting and the vanilla-y cake. (Oh, I also vow to take better photos….I don’t know what was wrong with me this time.)

So, stay tuned and send me any suggestions you might have.  I can always use them!